-
Optical Quartz Glass
-
Machining Quartz Glass
-
Quartz Glass Tube
-
Quartz Capillary Tube
-
Borosilicate Glass Tube
-
Quartz Glass Rod
-
Laser Spare Parts
-
Silicon Dioxide Sputtering Target
-
Quartz Apparatus
-
Quartz Glass Plate
-
Custom Glass Parts
-
Custom Ceramic Parts
-
Optical Manufacturing Equipment
-
Mobile Glass Cover Making Machine
-
Optical Measuring Instrument
-
Optical Crystal
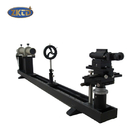
High Precision Optical Measuring Instrument Lens Focal Length Meter
| Type | Optical Measuring Instrument | Function | Measure The Focal Length, Discrimination Rate, Effective Aperture And Other Imaging Quality Of Lens And Combination Lens |
|---|---|---|---|
| 1x Objective Lens Focal Length | 67.5mm | Working Distance Of 1x Objective Lens | 35mm |
| 0.5x Objective Lens Focal Length | 200mm | Working Distance Of 0.5x Objective Lens | 300mm |
| Eyepiece Reticle Grid Value | 1mm | Minimum Grid Value Of Eyepiece Micrometer Drum | 0.01mm |
| Highlight | high precision optical measuring instrument,focal length optical measuring instrument |
||
Optical Measuring Instrument High Precision Lens Focal Length Meter
ZKTD-330 high-precision lens focal length meter (focal length measuring instrument) is used to measure the focal length, discrimination rate, effective aperture and other imaging quality of lens and combination lens. Different measuring devices can be used according to the inspection purpose and selection method.
Usage
Focus measurement:
1. Wipe the measured lens clean and place it in the self-centering three-claw claw of the lens for clamping.
2. Install the glass compass into the collimator, install the lighting source, and turn on the light source.
3. Adjust the micrometer eyepiece so that it can see the cross lines and the reading distance reticle lines at the same time.
4. Loosen the fixed hand wheel of the lens holder, move the lens holder back and forth, so that the scribed line of the glass roller plate in the collimator can be seen in the reading microscope and imaged on the eyepiece scribed plate, and then tighten the fixed hand wheel.
5. Rotate the knob of the longitudinal slider to make the longitudinal slider move back and forth, so that the image of the glass plate can be clearly seen on the eyepiece reticle until the difference is ignored.
6. Rotate the eyepiece micrometer drum to make the cross line on the moving reticle fall on the left end of the corresponding matching line of the glass plate, and record the reading; Then move the crosshair line to the right end of the matching line and record the reading. The difference between the two readings is the y 'value of the tested lens. According to the previous calculation formula, the focal length of the measured lens can be calculated through the formula. The average value can be obtained by repeated measurements, so that the data obtained is more accurate.
Performance characteristics
This instrument is mainly used to measure the focal length of the optical lens. Its design principle is based on the Foucault collimator method, that is, the focal length of the measured lens is calculated by using the proportional relationship between object imaging and the focal length of the collimator and the focal length of the measured lens. Its measurement accuracy is about 0.3%. When using the comparison method to measure, its accuracy can also be improved appropriately.
1. The distance between the outermost pair of long scribed lines on the parallel line reticle, namely the glass compass plate, is 20mm, and it is 10 inwards in turn; 4; 2; 1mm, placed at the focus of the collimator, mainly used for measuring the focal length and checking the magnification of the objective lens.
2. The micrometer eyepiece is mainly used to read the distance. There are 8 grids in the upper end of the eyepiece field of view, and the spacing between each grid is 1mm. It is used to read the integer part for measuring the focal length.
3. The moving reticle in the eyepiece is composed of cross lines and two vertical parallel lines. When the micrometer measuring drum of the eyepiece rotates, the cross lines and two vertical parallel lines on the reticle move at the same time. 100 divisions are carved on the slope of the micrometer measuring drum, and the reading of each division is equivalent to 0.01 mm.
Technical indicators
1. Focus meter main part:
1.1. 1x objective lens focal length: 67.5mm;
1.2 Working distance of 1x objective lens: 135mm;
1.3. 0.5x objective lens focal length: 200mm;
1.4. Working distance of 0.5x objective lens: 300mm;
1.5. Eyepiece reticle grid value: 1mm;
1.6. Minimum grid value of eyepiece micrometer drum: 0.01mm;
1.7 Field of view of micrometer eyepiece: 8mm;
1.8 Measuring focus range:
1.8.1 Convergent lens:+10~1000mm;
1.8.2 Divergent lens: - 10~- 500mm;
1.9. Maximum diameter of measuring lens: 100mm;
1.10. Length of guide rail of optical tool base: 1500mm;
1.11. Transverse movement scale range of reading microscope: 120mm;
2. Collimator part:
2.1 Focus of collimator: 550mm;
2.2 Star point plate: φ 0.05mm;
2.3. Identification rate plate value range: 3.75 seconds to 15 seconds;
2.4 Distance between parallel lines: 20, 10, 4, 2, 1mm;


